Deck Company Things To Know Before You Get This
Table of ContentsTop Guidelines Of Deck Builders RaleighFence Companies Raleigh Fundamentals ExplainedThe Best Guide To Deck Builders Near MeHow Deck Builders Raleigh can Save You Time, Stress, and Money.The 30-Second Trick For Fence Company Near MeWhat Does Deck Builders Mean?
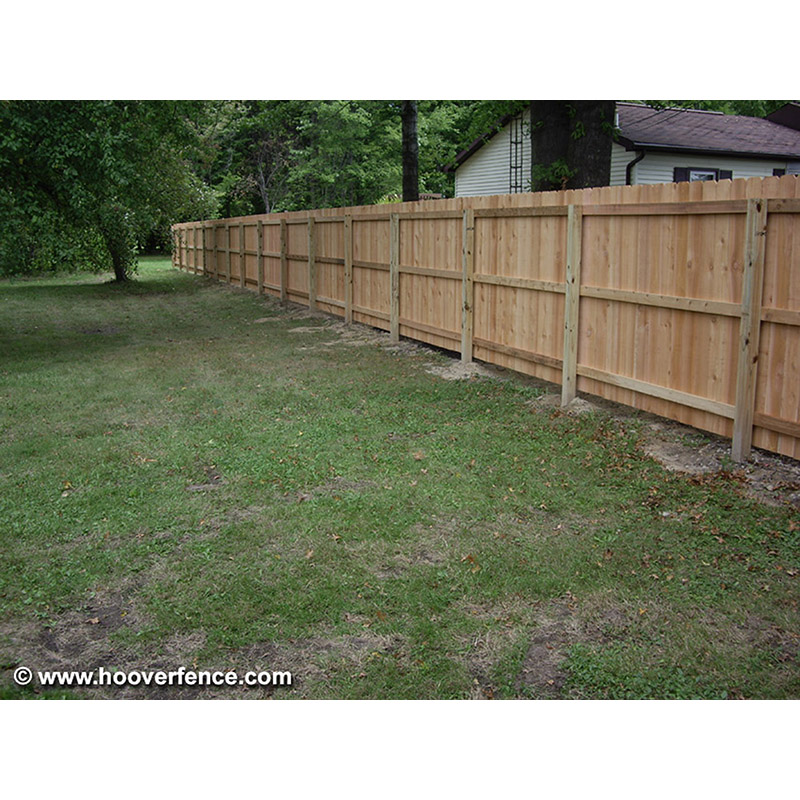
Cedar fencing pickets with pressure treated blog posts will certainly last the longest. The key to a long lasting fence is using stress dealt with timber messages and also rails along with cedar fence pickets. Cedar is normally rot resistant, so it's a fantastic timber to use outdoors. You can utilize cedar rails however I would certainly recommend you utilize pressure dealt with 24's.
You can definitely construct a fencing on your own. There aren't a lot of steps to developing a fencing and the process isn't extremely complex.
The Basic Principles Of Deck Builders Raleigh
If you do not secure the cedar secure fencing will certainly discolor to grey over an extended period of time. When set up appropriately a cedar fence can last between 15 as well as 30 years. You need to make use of deck screws on your timber fencing. These are made to be made use of outdoors and will certainly stand up to the extreme climate as well as won't rust.
Get rid of any type of huge rocks as well as rocks you locate in the ground. If you experience a big rock that is not able to be eliminated from the ground, maintain reading since we included a video below all concerning exactly how to establish a fencing article in rock. It aids to have an extra set of hands for this step.
Unknown Facts About Fence Company
After your blog post holes are dug, you can add your article in the center of the opening. Fill up the hole with the cement blend up to 3-4 inches listed below the ground level.
You can use your shovel to manually mix the concrete mix and also water in the red. Prior to the cement solidifies, make certain your blog post behaves as well as straight by making use of a degree. Once it is right, support it to the ground with landscape risks screwed right into the fence article. As you remove your fence message openings, you may encounter some rocks and boulders.
!! Here's the general process: Pierce a big opening in the rock base where you want to fence article to go. Tidy out the hole by blowing pressed air right into the hole (Deck Builders Near Me).
How Fence Company can Save You Time, Stress, and Money.
Establish post support into hole quickly and see to it it's straight. Let sticky dry/cure. Include fencing blog post right into support and screw right into area. Backfill staying area More hints of the opening with concrete and water. Mix with shovel and allow completely dry. Once your cement has actually had time to completely dry (examine your bag's guidelines for appropriate completely dry time), you can begin linking all of the blog posts as well as include your rails.
We placed the bottom rail concerning 8 inches from the ground, the top rail concerning 8 inches from the top of the fencing as well as the other one in the middle of the top and bottom rails. Measure as well as mark your initial fence message and screw the rail braces right into area on the messages.
Lay out your pickets along your fence as well as start screwing them in one by one. Some individuals make use of nails but your fence will certainly last a lot longer with screws.
7 Easy Facts About Fence Company Near Me Shown
You do not require to set up the pickets with any kind of rooms in between them. We added one near the front backyard so you can easily access the yard via the side gate.
Mark your fence blog post locations (8 ft apart)Dig message opening with blog post opening digger. Go at least 2 ft down and also 12 inches vast for a 6 ft fence, which will use 8 feet messages. You want the base 2 feet to be in ground. Establish fencing posts with cement.
Connect fence pickets with 6 screws on each picket (2 at each rail)Develop entrance (if needed). We summed up try this website the entire process of developing the entrance in a separate video and article, so be sure to check that out here. As you remove your fencing blog post openings, you might encounter some rocks as well as stones.
The Greatest Guide To Fence Companies Raleigh
You may run into a stone so huge that it is incapable to be removed from the ground. This is what occurred to us in our yard! We summarized the entire process in this You, Tube video. Pierce a huge hole in the rock base where you wish to fence message to go.
Fill up hole with epoxy/acrylic anchoring adhesive we used this. Establish message anchor right into opening instantly and also make certain it's wrought iron fence gate straight. Allow glue dry/cure. Include fencing post into anchor and screw into place. Backfill remaining area of the hole with concrete as well as water. Blend with shovel and also allow completely dry.